
Step-by-Step Instructions
- Bake the cake according to package directions in a 9×13 inch baking pan. Allow it to cool completely.
- Once cooled, crumble the entire cake into a large mixing bowl. Make sure there are no large lumps.
- Add about 3/4 of the can of cream cheese frosting to the crumbled cake. Mix with a spatula or your hands until well combined and the mixture can be rolled into a ball without crumbling. Add more frosting if needed, a tablespoon at a time.
- Roll the cake mixture into 1.5-inch balls (about 1 oz each) and place them on a parchment-lined baking sheet. Chill the cake balls in the refrigerator for at least 30 minutes, or freezer for 15 minutes, to firm them up.
- Melt the white candy melts in a microwave-safe bowl in 30-second intervals, stirring in between, until smooth. If too thick, stir in coconut oil or shortening a teaspoon at a time.
- Dip the tip of each lollipop stick into the melted candy, then insert it about halfway into a chilled cake ball. This acts as a ‘glue’. Repeat for all cake balls and chill again for 5-10 minutes to set the glue.
- Dip each cake pop into the melted white candy, ensuring full coverage. Gently tap off any excess candy coating by lightly tapping the stick on the edge of the bowl.
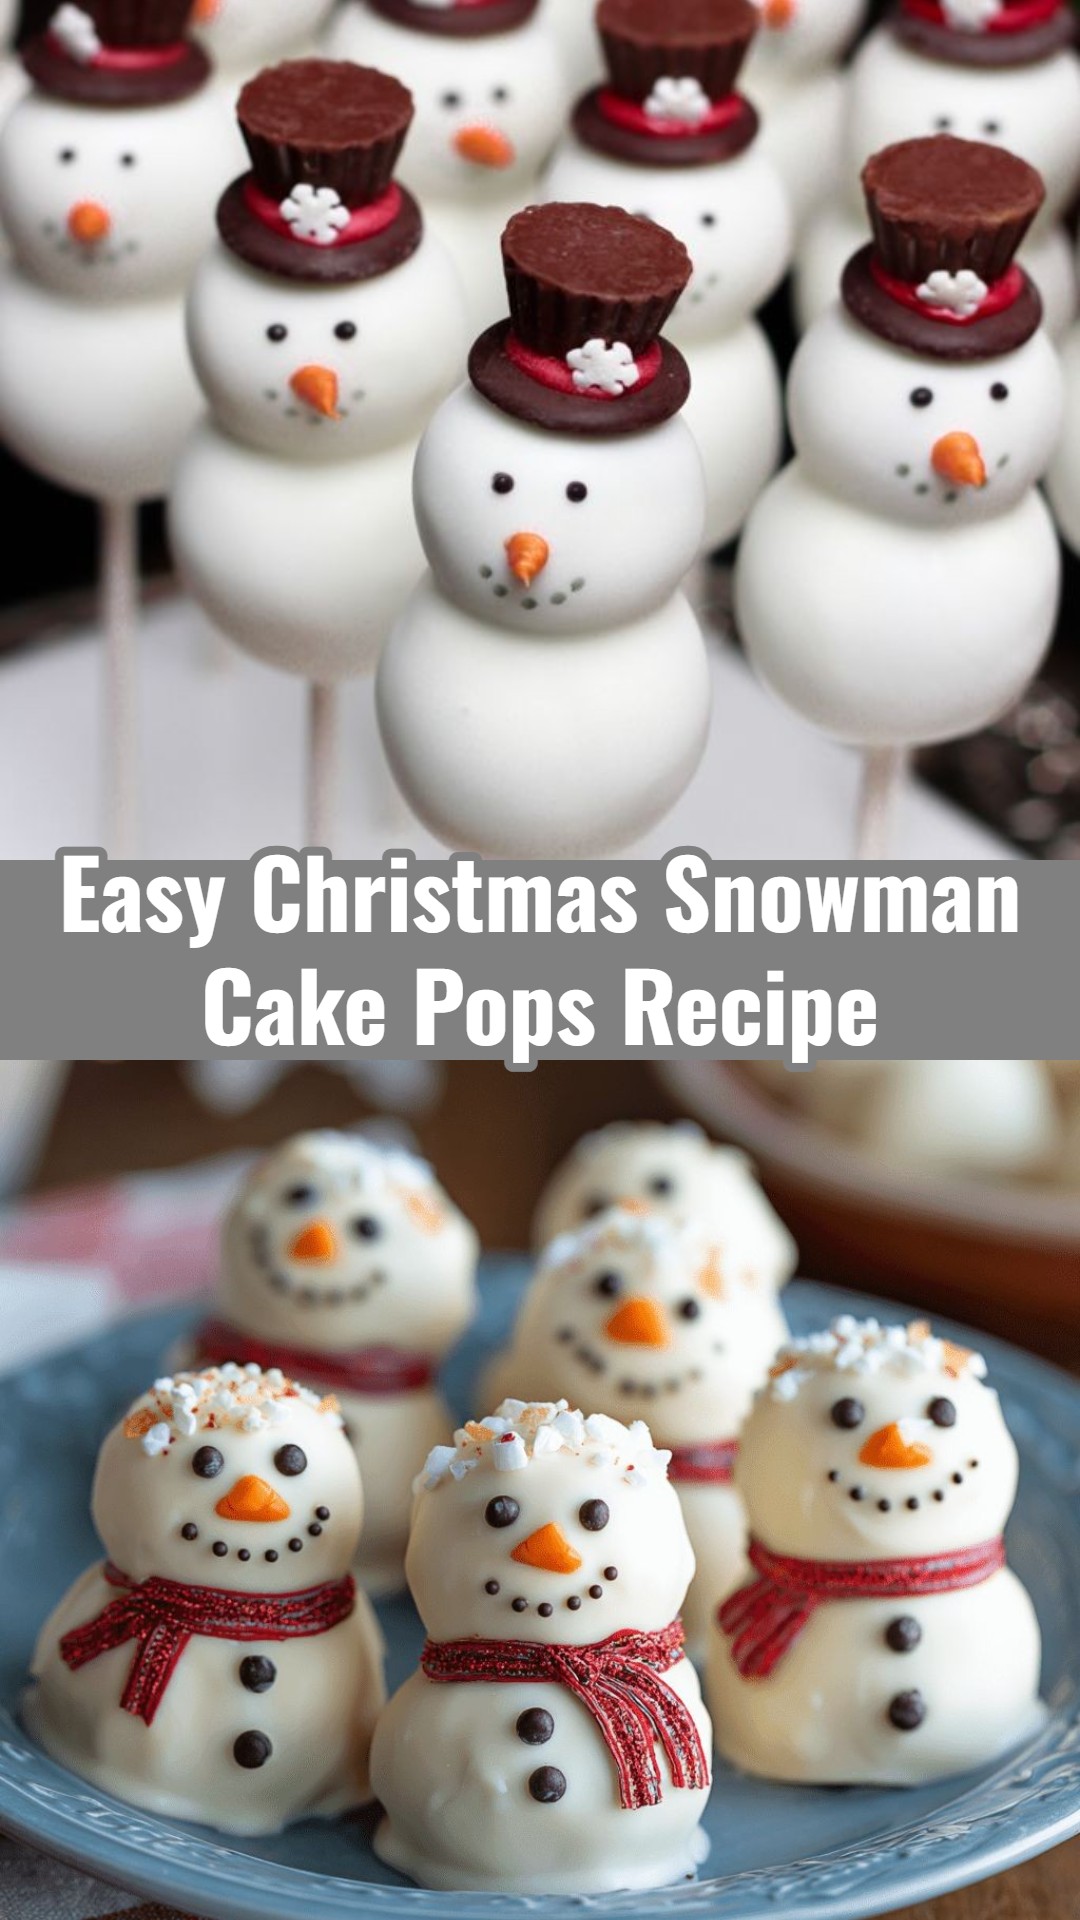
- While the coating is still wet, quickly decorate to create your snowman. Use mini chocolate chips for eyes and buttons, an orange sprinkle or candy for the nose, and a piece of red licorice lace for a scarf. You can also add sprinkles for a hat.
- Place the finished cake pops in a styrofoam block or a tall glass to dry completely. Allow at least 15-20 minutes for the coating to set.
- Once set, they are ready to be served or stored.
Full Ingredients
- 1 box (15.25 oz) vanilla or white cake mix (plus ingredients required on box: eggs, oil, water)
- 1 can (16 oz) cream cheese frosting (or your favorite buttercream)
- 24 oz white candy melts
- 2 tbsp coconut oil or shortening (optional, for thinning candy melts)
- Mini chocolate chips (for eyes and buttons)
- Orange sprinkles or small orange candies (for noses)
- Red licorice laces or thin red candies (for scarves)
- Various sprinkles (for hats or extra decoration)
Shopping List
- Pantry: 1 box vanilla or white cake mix, 1 can cream cheese frosting, 24 oz white candy melts, Mini chocolate chips, Orange sprinkles, Red licorice laces, Various sprinkles, Coconut oil or shortening (optional)
- Dairy & Eggs: Eggs (as per cake mix instructions)
- Oils: Vegetable oil (as per cake mix instructions)
Equipment Needed
- 9×13 inch baking pan
- Large mixing bowl
- Hand mixer or stand mixer
- Rubber spatula
- Cookie scoop (optional, for even sizing)
- Lollipop sticks (6-inch)
- Microwave-safe bowls or double boiler
- Styrofoam block or tall glass (for drying)
- Parchment paper or wax paper
Variations & Serving Ideas
These delightful Christmas Snowman Cake Pops are an instant hit for any holiday gathering, transforming simple snack ideas into festive masterpieces. Present them standing tall in a decorative mug, a Styrofoam block draped with tinsel, or as part of a stunning tiered dessert display. They’re absolutely perfect served alongside a steaming cup of hot cocoa, a creamy eggnog, or a vibrant holiday punch, making them ideal for kids’ parties or even as a unique treat for a Christmas birthday celebration. For storing leftovers, keep them in an airtight container at room temperature for up to three days, or refrigerate for up to a week. If you’re planning ahead, these festive treats freeze beautifully for up to a month; just remember to thaw them in the fridge before serving for optimal enjoyment.
We hope these easy-to-make Christmas Snowman Cake Pops bring a huge dose of holiday cheer and deliciousness to your kitchen! They truly embody the spirit of festive fun and are guaranteed to be a highlight of your holiday spread. We’d love to hear how your snowman creations turned out, so share your favorite decorating tips or funny stories in the comments below! Happy baking, and may your holidays be filled with joy and sweet treats! #HolidayBakingEasy #ChristmasThemedSnackIdeas #EasyBakingRecipesChristmas #ChristmasIdeasBaking #ChristmasFoodHacks #SimpleChristmasBakingForKids #FoodForAChristmasParty #ChristmasBirthdayPartyIdeasForTeens #ChristmasTreatsNoBake
